In my research i used youtube a lot to compare different trailers, therefore i set up an account to manage all the trailers and make them easily accessible.
This is also where we uploaded our animatic storyboard and final teaser trailer.
As a group we also used googlemail as a way of communication between us, and it also helped with contacting actors to arrange for filming.
We also used Facebook as a means of gaining audience feedback.
Planning

New media had a major impact on the planning stage as i used it for many different means. Using Google as my search engine i was able to find the available images for my props and costume designs. Google also came in useful when used to create our mock-up poster for our film. To further make the poster we used Photoshop CS3, which enables us to have full control over how our poster would take shape.

The fonts we used throughout the course were all taken from www.dafont.com, a free font database giving us many styles to choose from which was useful.

I was given the responsibility to make the animatic storyboard for our project, and i put this together using Final Cut, which is video editing software. This helped to key in our story and to link it with music. This gave us a realistic idea of how our trailer would pan out.

Linking with this i was also in charge of producing the music, and did this on Logic Pro. This was useful to do early, so we could use the music as a base for our trailer.
Once we had picked our location, we decided to do a location recce to see how the filming would pan out. The photographs were taken on a samsung tocco light, producing images of good enough quality to use. This gave us an idea of the surroundings for filming.

Construction
For the actual construction, new media types were used heavily for our filming and editing. We used two cameras, one borrowed from the college and the other from one of my friends. This enabled us to achieve different looks within our trailer. The cameras we used were the:
 Sony A1E
 Sony HVR-V1E
After the filming occurred, i uploaded from tape our filming, and converted and rasterized the video to work on the mac. I then joined it on final cut with our music track. Using final cut i was able to use transition effects to take it from one shot to another. I feel that my use of transitions in conjunction with the video work really well together. Here are some screen grabs of our work with the trailer:
 Importing the music track onto our trailer.
 Using different transition effects.
We also used two different DSLR cameras to produce the images for our final ancillary products. For the shoot in the studio we used Grace's Nikon D40x camera, which is renowned for better quality images inside, and we used Ellie's Cannon 450D for the outdoor shoots, because of the better equipment we had to use with this camera.
 Nikon D40x
 Cannon 450D
The magazine design was done by Ellie, with input and feedback from the rest of the group. She used Adobe Photoshop CS5 to make the designs, and started by creating a basic layout for the piece.
 Poster
 Magazine
she then began editing the photos and bringing them into Photoshop and into a layout we all felt was most aesthetically pleasing. Here are a few screen grabs of Ellie editing and layering our work:


Evalution
To analyse our work we created our audience feedback sheets on word, and scanned them in and uploaded them to blogger. This helped us to clearly see what aspects were needed for improvement, and what was good about each individual product.
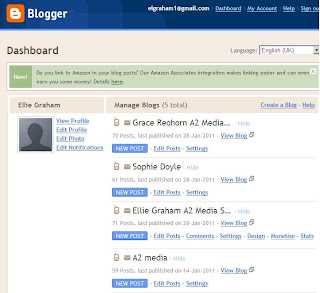
Overall, the work we have created has been heavily influenced by new technology, and this has been showcased throughout the project. We also used blogger to consistently showcase our work.


